if this is your first time to the zoo, please read my very first post found here. If you like what you see, feel free to subscribe. Thanks!

19 March 2013

Winner, Winner, Chicken Dinner!

CHEEP!
CHEEP!
CHEEP!

We are now the proud owners of four little chicks. Fluffy, yellow, adorable little chicks!

16 March 2013: Our four girls on their way home. Three days old.


We've been mulling over the ideas of raising chickens for awhile. At our old house, it was legal to own three hens, but we really didn't have the room in our tiny backyard for 200 lbs of dog and a coop. Since we've moved to outside city limits, we're pretty much unregulated by the county. This is our first full spring/summer cycle at the 1240 house so we've made the leap!

On Saturday (16 March 2013) we bought four Russian Orloff chicks from Farmland in Silverdale. (Sidenote: I sort of detest that store for the way they treat their puppies, but it was our only option for instant chicken gratification. I wasn't completely comfortable with mail-order chicks.)

Since we are crunchy hippies, we brought the birds home, released them into our house so they'd be "free range" and that's that. Just kidding.

We learned (thank you, Google!) that they need a safe, warm place to live for the first 6-8 weeks. Most people use a "biddy" box or a "brooder." They're both essentially the same thing.  You want a space for the babies to run around, eat, drink, sleep, poop, and be warm.

The container: Most blogs/how-tos suggest 2 square feet per chick and walls at least a foot high. We opted for the biggest clear, plastic tub sold at Walmart. It is 95qts and was $11 with a lid. We have since learned that the girls will be able to hop out of a tub this short within a few weeks without something to keep them in or a taller box. P.S. you will not be using the lid or you risk suffocating the chickens in their own gasses.

This bin is on amazon.com and costs double what we paid at Walmart, but you get the idea.
The "lid": We purchased a few feet of hardware mesh from the feed store. Don cut it a few inches bigger than the top of the bin and covered the poky edges with tape. The mesh can sit over the top of the box to contain the chicks without suffocating them. The mesh also allows the heat of the lamp to still warm the chickens without fire risk. Right now we don't need the lid so we don't bother with it. We'll throw it on when they start to get rowdy.

Sample of hardware mesh


The bedding:  You don't want to use anything except for pine bedding. Newspaper is too slippery and can cause major leg issues in your chickens.  Almost all other types of bedding are toxic if ingested and/or inhaled. We found a little package (meant for rodent cages) at Walmart for $3. It took about a tenth of the package to put down a 2-inch bed for the birds and it needs to be changed out every few days.


Bedding sweeper: I grabbed a small handbroom and dustpan set on a whim at Walmart. It was a few dollars and will make getting the bedding out of the bin easy.


Food dish and food: We found a bird feeder at Goodwill for a few dollars. However, the feed store sells perfect little feeders for $2. We also got medicated starter feed at Farmland. The 25lb bag was about $13 and I don't have a good feel for how long it will last. It seems the chicks are currently eating about a half cup a day, total. You will also need somewhere to store the food because it is perishable. We threw the whole bag into a big plastic bin we had sitting around in the garage, but a metal trash can with a lid would work. You could also portion it up into smaller containers like old coffee cans. I definitely recommend that you don't skimp on a dedicated chicken or bird feeder because young chicks have a hard time distinguishing feed from their bedding. If they eat too much bedding, they can get sick. If you try to feed them in an open fashion, they will probably just poop in their food and kick it all over.

You fill a jar full of feed and screw it in upside down. The birds eat out of the holes but can't poop in their feed. Silly birds.


Waterer: We bought the waterer base at Farmland for $2. You fill a mason jar, screw the waterer on it, and then invert the whole thing. Similar to the feeder, you can't just put an open thing of water in the box. They will find a way to poop in it and then drown. If you don't want to buy a dedicated waterer, you can use a small, shallow dish (like a peanut butter jar lid) and put glass aquarium rocks in it. It will leave enough space for them to drink but not enough for them to drown. They will still poop in it, however.  Also, you want to elevate the waterer by half an inch or so because they will kick too much bedding in it otherwise. We put ours up on a wood scrap we found in the garage.

You fill a mason jar with water and invert it on this thing so they don't die of thirst.


Heat source: Mother nature planned for the chicks to stay warm by having a mother hen to run under. Well we don't have that. Instead, we got a heat lamp base from the hardware section at Walmart for $9 and a 100-watt incandescent bulb. We put a board across the top of the bin and clamped the lamp on it. It works like a charm. Depending on where you plan to keep your box, don't forget an extension cord!  NOTE: The heat lamp is a FIRE HAZARD. Please make sure it is secured well and that the cord is tucked away from kids, etc. SECOND NOTE: As your chicks grow, they will be capable of hopping up to roost on things. I have read several accounts of heat lamps being pulled down because the chicks decided the power cord would make a lovely roost. As soon as you see them start to roost on things, you need to secure the lamp and the cord in two places.
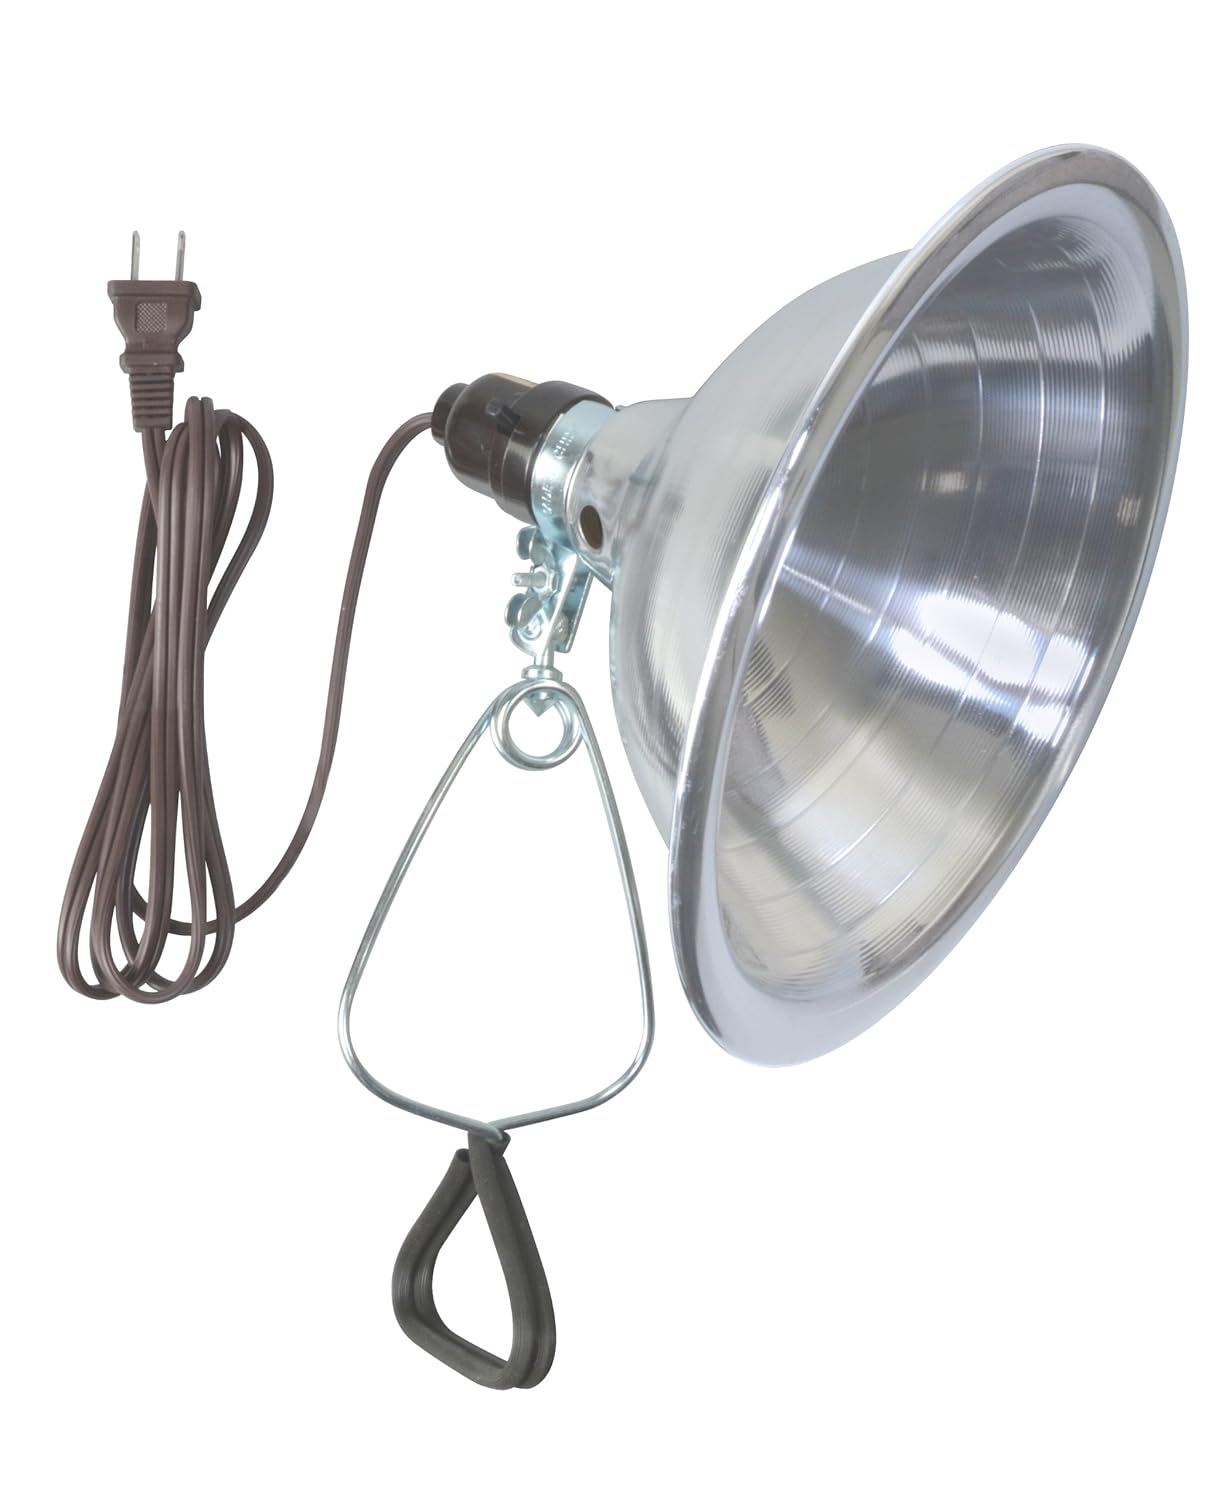
Heat lamp fixture

The Set Up: Wash your bin with warm water and mild soap. Rinse well, dry, and spread a 2-inch layer of pine bedding. Wash the waterer and feeder with warm water and mild soap, rinse, dry and fill. Place them in one end of the bin.  Add a bulb to your fixture and decide how to hang it over the other end of the bin. The chicks actually need to keep very warm the first few weeks so you'll find clamping it to a board that spans the top of the bin will work the best.

Is it working? Add your chicks gently to the bin and leave them alone to acclimate. Sit back and observe.
  • Observe that each chick drinks water and eats feed. Most of them won't eat right away until they calm down and they are much like lemmings: what one does, the others do out of curiosity. If they don't start drinking, dip the very tip of the calmest bird's beak into the water then let her go. If they don't start eating, gently tap on the base of the feeder. They will be drawn to this noise and should find the feed in no time. 
  • Wait until they all calm down and see where they group. If they huddle together directly under your lamp, they are cold and you need to find a way to increase the heat. Either lower the lamp or put a higher wattage bulb in. Make sure there are no drafts over the bin. If they "pant" and settle down far away from the lamp, they are too warm. Move the lamp up or reduce the wattage. Make small changes and give them 30-40 minutes to change their behavior. 
  • Birds who are happy with the temperature with snuggle with each other on the perimeter of the lamp "halo" and will happily wander away from the lamp for food and water. 
  • Don't be alarmed if your chicks fall asleep standing up and start to fall over or if they fall asleep on their faces. They're silly babies and they're alright.

Silly girl sleeping on her chin while her sister contemplates her reflection in the waterer. (3 days old.)
Getting used to their lovely home! Note the two on the left are sleeping on the edge of the lamp "halo" which indicates they have a good temperature. (3 days old.)
Barley was VERY excited about the birds...he's going to have to learn better chicken manners.

My five-day-old sleeping beauties.
Five-days-old and sleeping like she's dead.

The next chicken post will talk about daily upkeep and preparing for their lovely chicken futures.

Part 2: Cleaning Out the Toxic Products at Home

Here are the biggest reasons why our lives are full of toxins:

1. It takes a lot of time and devotion to research products, companies, ingredients, and options. 
       Here's the link to Part 1.

2. It is expensive. 

3. We live blindly with the belief that if a doctor recommends it or if it's sold at Target, it must be fine for us.


Part 2 will address the second reason and my suggestions.


  2. It is expensive.   


I touched on this in my first post, but the biggest way around this is to realize that most of the household products we buy, we don't really need. Sounds too good to be true? Keep reading.

 Are you willing to pay more for a product that has "green" or "natural" or "organic" claims on the label? Stop! Really, most of them are misleading scams and you are actually hampering your quest to get rid of toxins by spending more of your budget on things that are still toxic.

A great example of a "greenwasher."  This product was rated a 7 by the EWG...it's NOT safe but touts itself as natural!


Ask yourself how what people used to get the job done 100 years ago. The answer, for me, is usually that I have no idea. But let's be honest: our grandparents and great grandparents got along just fine. They weren't stinky Victorian-aged ruffle wearers who only bathed once a year. (Well, maybe yours were or still are, but I promise not everyone lived that way.) 100 years ago, folks lived with much less in general, but they still had clean houses, clean laundry, and clean bodies. You know what else they had? A much lower incidence of autism, asthma, environmental allergies, food allergies, etc. It absolutely makes sense to see if we can go back to the "simple" times and still get the job done without much heartache. No, I'm not asking you to have a pot of lye on your stove for making your own soap. Whoa. Let's not go back quite that far!  Here's my list of "simple" ingredients and I use them for 99% of household jobs:

  • White vinegar
  • Apple cider vinegar
  • Citrus vinegar
  • Blue dawn dish soap
  • Castillle soap
  • Baking soda
  • Bleach
  • Ammonia
  • Rubbing alcohol

Is that list too good to be true? Sometimes, yes. But most of the time, no. You can clean any surface in your house with some combination of these ingredients. I'll post recipes in a later post or two, but you can google recipes for every surface. Here we clean walls, windows, doors, carpet, microfiber couches, laminate floors, laminate counters, appliances, metal sinks, porcelain, doggie paws and faces, the washing machine drum, dishes, hair, skin, etc using these ingredients alone.

Disposable = costly and wasteful.    We rarely use napkins and paper towels anymore. They've been replaced with dish towels, cloth napkins, t-shirt rags, and bamboo-cotton "paper" towels.  Has it saved us thousands of dollars? Nope, not yet. But I honestly can't tell you the last time I purchased paper towels or napkins. I don't miss them either. We keep a roll of paper towels around for really icky or greasy messes. Other than that, there is a cloth option for everything else. And it barely adds to our laundry. Oh, and it makes eating Chinese leftovers that much fancier when you get two wipe noodle grease off of your nose with a cloth napkin! We used to go through a pack of Costco paper towels every three months. That equates to $80 of paper towels per year.

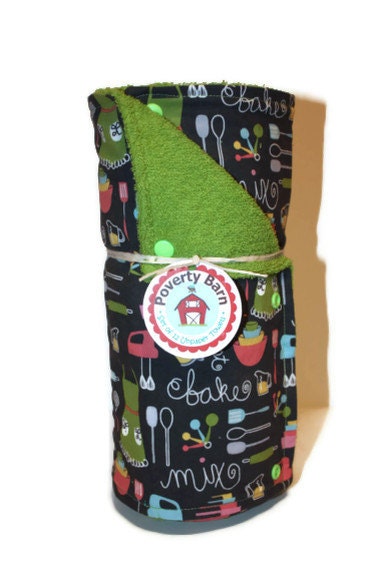
Who can resist the charm of these "unpaper towels"?? Soft and absorbent, they snap together to pull off the roll just like your normal paper towels. We use a mix of a similar product and a smaller towel made of birdseye cotton. Gets the job done BETTER than regular paper towels.


So what do I still pay for? Dishwasher pods, laundry detergent, body wash, body lotion,  toothpaste, coffee filters, face oil, toilet paper, contact solution, q-tips, cotton balls, and loofahs. That's what I could come up with off the top of my head. Most of these items are on this list because I haven't had time to research a suitable substitution...but I'm working on it.

Dishwasher pods: I've tried several homemade recipes to no avail. I think a combination of my unwillingness to use borax, our crappy dishwasher, and our water quality makes it hard for homemade recipes to succeed. I found that most of the time, only half of our dishes would come clean at any time, even with vigorous pre-rinsing and generous spacing of the dirty dishes. For now, we are using Method Smarty Dish Plus pods, which I linked to in an earlier post. They work well and while I question some of the ingredients, they're the safest effective option available right now. Oh, I also have a bag of Honest Co. dishwashing pods. So far, they seem to work equally well, but neither product is great when it comes to being safe and non-toxic. They are better than your average dishwasher pods, though.

Laundry detergent: Sort of the same story as the dishwasher pods. I tried a few recipes and they didn't work. It's probably my fault, but let me let you in on a little secret. Being non-toxic doesn't work for me if it involves laborious, time consuming steps. So no, I haven't ground up any bars of castille soap or fels-naptha. Probably the detergent recipes with these ingredients would work better. My other hesitation comes from the fact that we will be laundering cloth diapers soon and I want to NOT being doing science experiments with our detergent on the diapers. I would be heartbroken if I ruined any of our diapers (because they are SO stinkin' cute) and I'd be even more upset if my experiments caused a rash on baby. For now we're using Country Save powdered detergent and vinegar in the softener drawer. That's it. I don't even use dryer sheets, but I'm hoping to pickup some WAHM dryer balls in the next month to play with.  I will also admit that I'm hoping to switch to soapnuts as soon as I can find them for a good price because they're CD-safe (cloth diaper safe) and completely natural.

Body wash: Full-disclosure...this paragraph might gross you out. That's fine. I don't use shampoo. I don't shower every day. Eeew. Gross. There you go.  If I do vigorous activity, I shower. I still don't use shampoo, though. So what do I do? Well, if I feel like my hair needs more than water, I will dissolve some baking soda in a squirt bottle and hit the roots. Most of the time, water is all I need! The major exception is after swimming in chlorinated water. I definitely like to use a little Dr. Bronner's Baby Castille. The stuff is fantastic and gentle. I will also use a half/half mixture of apple cider vinegar and water for a conditioner. But when it comes to body wash, I don't feel like I'm clean unless I use something with bubbles. I found the Bronners a little too harsh for my skin so I picked up a bottle of Method Naked Body Wash one day when I was feeling desperate. I don't love it and I don't hate it. I have a bar of wash on order from the etsy shop called GudonyaToo and I can't wait to try it out. When it's gone, maybe I'll have the courage to try my own recipe based on some other recipes that I've found which use a mix of coconut oil, essential oils, and castille soap!

Toothpaste: I currently use and love Earthpaste. Super safe, super yummy and easy to get from vitacost.com. I know lots of people make their own, but I'm picky on flavor and texture and that isn't a burning building that I'll be running into anytime soon!

Coffee filters: I've actually seen great alternatives to disposable paper filters on etsy made of unbleached cotton and finished with French seams. BUT, my husband is the primary coffee maker in the house and we both decided it isn't worth the hassle of trying to scrub out that pesky coffee dust every morning. That would sort of sap the joy out of that first steaming cup. Besides, the filters we use now are organic, unbleached, cheap, and something with a low environmental impact from start to finish. We can feed 2 used ones per week (with the grounds) to our composting worms and will probably be able to feed even more once it warms up and the wormies find bigger appetites.

Face Oil: I can't live without maracuja oil and argan oil. Oils in general are something I will always have to pay for, and I'm alright with that. I get my face/body oils from amazon.com or vitacost.com and buy the mid-priced, organic, cold-pressed versions ideally in dark glass bottles with glass dropper lids. Since stumbling upon face oils, I no longer need or use any other face moisturizers except for sunscreen and the occasional hit of toner on bad days. If you think your skin is too greasy for an oil, you're wrong! Start with a lighter oil (like argan) and see how it goes.

The last items on the list (toilet paper, contact solution, q-tips, cotton balls, and loofahs) are there because they are things that I can't make efficiently or safely, for the most part. After I recover from the baby, I am switching to using single-ply flannel instead of toilet paper for pee only. If that grosses you out, just remember that after baby comes, we will be doing a load of laundry every day or every other day full of soiled diapers and soiled wipes so a dozen extra squares with a little adult pee on them won't be a big event for us! It'll save lots of toilet paper too because I can never seem to keep too much from unspooling. Finally, has anyone tried using natural sponges instead of loofahs? I keep hearing mixed things (like they fall apart really quickly) so I need to do more research on that one.

Well, I just realized that this post was supposed to show you that being non-toxic can be inexpensive, but instead I spent hours rambling on about the things that I still spend money on. Oops. Hopefully you picked up on the idea that we no longer buy most cleaning "solutions", beauty products, or paper towels. We will also be purchasing much less toilet paper.  I'll post more "substitutions" in further posts to hopefully give you more ideas and solutions.