if this is your first time to the zoo, please read my very first post found here. If you like what you see, feel free to subscribe. Thanks!

23 March 2014

The Problem with Foil

Hi all!

This is a quick, non-thorough, non-comprehensive summary as to why you need to STOP COOKING WITH ALUMINUM FOIL right now. No, not when the roll is gone. No, not when you have time to "figure it out." Now. 

Why?

The most convincing argument I've found is THIS study published in the peer-reviewed International Journal of Electrochemical Science. It's 12 pages and quite readable, as far as scientific journal publications go.  I took the time to read it. Really, really read it. I majored in biomedical engineering and cannot possibly buy into a journal article without combing it over. The science and math is pretty impeccable and convincing for me as a consumer, mother, and cook.

Here's the abstract and about all you really need to know:

The results clearly indicate that the use of aluminum foil for cooking contributes significantly to the daily intake of aluminum through the cooked foods. The amount of leaching was found to be high in acidic solutions, and even higher with the addition of spices. According to the World Health Organization (WHO), the obtained values considered to be unacceptable.
Finally, excessive consumption of aluminum from leaching aluminum foil has an
extreme health risk effects. Aluminum foil may be used for packing but not for cooking.

Through a variety of experiments, they determined that for most foods cooked with or near foil, the amount of aluminum that leaches into the food is significant. Of course, it is dependent on serving size, but the article discusses how easily one could ingest far more than the maxium 1mg of aluminum per 1kg of body weight recommended by the World Health Organization.

Furthermore? Cooking is not generally our only exposure to aluminum. Some estimates show that without cooking with foil, we already are exposed to amounts greater than the WHO recommendation.

Ok, what else? Well the toxicology report was released in 1996 on aluminum. It's ridiculously long (393 pages) and can be found HERE. I'll be honest and admit that I haven't read the entire report.

What I have found so far is the answer to the comment, "Everything in moderation." No, sorry, cooking with foil does not count. Here's why:

You are always exposed to some aluminum by eating food; drinking water, ingesting medicinal products like certain antacids and buffered analgesics that contain aluminum, or breathing air. You may also be exposed by skin contact with soil, water, aluminum metal, antiperspirants, food additives (e.g., some baking powders) or other substances that contain aluminum Analytical methods used by scientists to determine the levels of aluminum in the environment generally do not determine the specific form of aluminum present. Therefore, we do not always know the form of aluminum a person may be exposed to.
So what? Why is it so bad?

Sometimes these people developed bone or brain diseases that doctors think were caused
by the excess aluminum. Some studies show that people exposed to high levels of aluminum may develop Alzheimer’s disease, but other studies have not found this to be true. We do not
know for certain whether aluminum accumulation is a result of the disease or its cause.

And for our children?

Children may be exposed to high levels of aluminum in drinking water. Brain and bone disease have been seen in children (...) Bone disease has also been seen in children taking some medicines containing aluminum.

The toxicology report also details how to avoid other sources of aluminum and lists: processed foods containing aluminum additives, cooking acidic food in aluminum pots and pans, antacids, buffered aspirin, and soy-formula for babies (Page 7).

Page 29 talks about the neurological effects of inhaled aluminum noting:

...significant correlations between urinary aluminum levels and memory test performance and between plasma aluminum levels and visual reaction time tests were found. Additionally, quantitative EEG changes, similar to those found in patients with aluminum encephalopathy, were also found in the welders. Hosovoski et al. (1994) and Sjogren et al. (1990) also found significant alterations in performance tests assessing reaction time, eye-hand coordination, memory, and/or motor skills in aluminum foundry workers and aluminum welders, respectively, and Rifat et al. (1990) found impaired performance on cognitive tests in miners exposed to McIntyre powder. Higher incidences of subjective neurological symptoms (e.g., incoordination, difficulty buttoning, depression, fatigue) were reported in two studies of aluminum potroom workers at an aluminum smelter (Sim et al. 1997; White et al. 1992) and in a study of aluminum welders (Sjiigren et al. 1990).

So by know, you're potentially crying out, "ALRIGHT! I GET IT! NOW WHAT?"

Well, let's start with a quick summary:

1. Foil is not for heating on or near foods, especially acidic foods.

2. Foil may safely be used as food packaging for non-acidic foods, as long as it is removed before heating.

3. Time to throw out aluminum cookware and utensils.


How to live without it?

1. Parchment paper! A great eco-friendly, non-toxic option for lining the bottom of your pans.

2. Silpats. These are thin, silicone lined mats that nothing can stick to!  Some people debate the safety of cooking with silicone, but as of now, there are no recognized safety issues.

3. Creativity.

Examples: I used to cook my ribs in foil packets. Now I cook them in a deep baking pan with a cookie sheet as a lid. I get an impressively tight seal with this method, but you can always weight the cookie sheet down with a glass dish or piece of stoneware.

Pie crust burning? Pick up a steel or silicone shield.

Parchment or baking paper can also be tented over the top of baked goods to keep them from burning when you'd traditionally use a foil tent.


I do quite a lot of cooking and not a lot of baking but we haven't used foil for cooking in over two years. Holler if you have a conundrum with eliminating foil from a recipe!


27 February 2014

Babies and Sleep, Version 1

When it comes to babies and sleeping, everyone has an opinion. So here's mine. Honestly, if you disagree, that's OK. If you feel like leaving a comment, that's OK too, but please be respectful and keep this in mind: I am a mama, not a doctor. If you disagree with me, that's OK too.  Bottom line. BE RESPECTFUL.

The first thing you need to know (if you don't already) is that babies need sleep. Lack of sleep hurts babies physically, mentally, and emotionally. It also makes being a good parent difficult if you're exhausted as well. If you don't believe me, pickup a copy of "Healthy Sleep Habits, Happy Baby" by Weissbluth. He cites study after study after study that prove kids who don't get good sleep early on face real struggles later on. (Disclaimer, he also describes how to use a cry-it-out method that I do not approve of.

The next thing you need to know is that every baby is different. I URGE you to realize that you know more about helping your baby have healthy sleep than you realize. Have a cup of coffee and think about the coping mechanisms you already know and use. Perhaps baby likes to be held a certain way, have a certain kind of pacifier, or to be rocked at a certain speed. Keep those things in mind!  And remember that each baby does things at their own pace.

The third thing you need to know is that babies should not be left to cry for EXTENDED amounts of time. But, there will be crying. (I will elaborate later on.)

I will eventually get around to a blog that starts at the beginning, from birth. But this particular one is for parents of babies who are older. It's hard for me to pinpoint the exact age but this is directed for babies at least 5 months old, and probably older. Babies this post is for should be rolling over in at least one direction, sitting fairly well, giving a large amount of social interaction (enjoying smiling mama, grabs at toys mama is giving attention to.) These babies should also be able to be soothed to sleep by dad but perhaps NOT by mom if they are still nursing.

Ok now that that's out of the way, I KNOW I haven't made everything clear and I hope to one of these days.

Here's the method: it's centered around the idea that babies can self soothe but may need a tiny bit of crying first. You, as the parent, need to pick your threshold. Also know that the threshold can change from nap to nap, night to night, or day to day depending on your mood. There are bad days where I cannot listen to the baby cry for more than 5 minutes, and other days the full 15 don't bother me one bit. (15 is the MAXIMUM, by the way.)

The basic idea is that you do almost your full effort to put baby soundly to sleep before setting baby down (or leaving alone) in a safe place. If baby awakens, you leave and wait the allotted amount of time before you go back in and put baby back to sleep. (If this sounds like cry it out, you're right! But instead of 2 hours of crying, we limit it to 15 minutes. We also don't do silly things like try and pat their back or rub their face when they're worked up and crying.) When baby wakens in the night, if it isn't time for a feeding, you let them cry the allotted amount of time, and go put them back to sleep.

This method can take several weeks to be effective and you may get really tired of continually putting baby back to sleep. However, I find this method to be extremely gentle. Yes, baby feels very alone if she is fully awake and crying, but I have discovered that babies are quite capable of looking and sounding extremely upset without being fully awake. Even if they are awake, the longest they cry is 15 minutes before you go soothe them completely back to sleep or as calm as you can.

And that's it, really. At some point, baby will wake for food. Please feed! Then either let baby fall asleep at the breast or bottle, remove, and put them down. If they wake, start the cycle all over again.

Ok, so that's not "really" it. There are other fine nuances that I think are important. Babies need to be warm but not too warm at night. Long sleeved pjs and a sleep sack accomplish this well unless your house is extremely hot/cold. Then add a heater or subtract the sleep sack. My baby also needs a cheap white noise machine. It helps mask the sounds of us doing housework and such. Babies also need a very strict bedtime routine. Ours is pajamas and bedtime diaper, sleep sack, a bit of snuggling/playtime on the bed, a pacifier and toy for story time, lights out, nurse both sides, get pacifier again, listen to a short story/poem, listen to two verses of "You are my Sunshine" while being held on her left side and gently rocked. We do this EVERY night. As soon as we get her sleep sack zipped up she rubs her eyes and starts yawning. Quite often she doesn't make it through her story before she tries to curl up and lay down. When I set her in her crib, she's often fairly awake but I sssshhhh her and rub her back until she settles enough for me to leave without instant tears.

Also, I think it's REALLY important to have lots of time touching mama or papa before bedtime. It refuels their need for touch. And when you go in to soothe them, use as little light as possible, do it as quietly as possible, and don't talk!

So, let me know what I've left out if you plan to try this method out. I know that it has worked extremely well for at least a dozen other mamas and I got tired of retyping it or retelling it for each of them so I decided to type it up.


Our nights used to be really tough. We used to wait until G was grumpy to start the bed time routine (major mistake) and by the time I tried to read her a story, she'd be crying and upset. Then I'd fight her just to get her to lay in my arms. On a good night, I could bounce her enough that she'd stop screaming and then she'd cry herself to sleep in my arms. Then I'd sit and rock her for an undetermined amount of time before she'd be soundly asleep enough for me to set down.  An hour or two later, she'd wake, I'd feed her, then she'd be wide awake, and I'd have to repeat. I was exhausted.  It turns out that I was feeding her when she didn't really need it. Once I tried just soothing her back to sleep, it was a miracle. She basically melted in my arms a minute after I'd pick her up. Times when I picked her up and she instantly started rooting? Well, the baby was truly hungry!

Our nights now are so much better. I do the bedtime routine (takes about 20 minutes total) and set her in her crib. Sometimes she's out cold. Other times she needs a bit of back rubbing to get her relaxed. Then I leave. Once in awhile she cries for a few minutes before settling,but most nights, she wiggles a bit and then is asleep.  She usually sleeps 11 hours straight, with at least TWO crying jags that never last more than 10 minutes. She isn't truly awake during these, even when she stands up. WEIRD but true. I know because if I go in there and pick her up, she startles and her crying changes.

Even when she was teething, she'd wake up more often and need help going back to sleep maybe twice. Usually one of those times she would want to nurse.

So, I know it's killer to listen to a baby cry for 15 minutes. I do. Try turning off the monitor and starting a timer. When time's up, check the monitor. If baby is still crying, head to the nursery!  Just remember that most traditional "sleep training" methods encourage you to let baby cry for HOURS which is horrible. When baby does fall asleep, it's because they're exhausted from being alone and crying and feeling abandoned. When we first started my method with our daughter, she was 7 months old. I think the earliest we  could've started was 5.5 months with her, but that might have been too soon. It took a solid month before she would go to sleep and stay asleep on the first or second try but her night wakings decreased significantly. She is now 10 months old and she sleeps through the night!  Yay!

My final note is that I don't believe that some babies can go to sleep successfully without crying ever. My daughter cries before she sleeps NO MATTER WHAT. If I nurse or rock or wear her to sleep, she cries a little. My goal was to come up with a method that allowed her to self-soothe without crying any more than she does when I soothe her. I think I succeeded!

02 February 2014

Blessed

What does being blessed sound like?


It sounds like the furnace and the dishwasher and the washing machine running /

While a baby bangs a wooden spoon in a pan /

And a husband who fries fresh eggs on the stove.


It sounds like dogs barking at the mailman /

While mama plays hundred year old songs on a fiddle /

And the rooster crows in the yard.


It sounds like coffee percolating /

While the phone rings /

And the calendar fills up.


It sounds like the creaking of a sturdy house in a storm /

While food thaws for dinner /

And the neighbors wave hello.


Sweet Potato Breakfast Bowl

Good morning!

Let's talk about breakfast for a second....I'm one of those crazy people who cannot start their day without a big, old fashioned, hot breakfast. Cereal? Oatmeal and fruit? NO. First, I don't find them satisfying in any capacity. Second, I find myself starving less than an hour later, no matter how much I eat. And I'm not kidding;  not too long ago I ate six packets of oatmeal for breakfast, left the house to run errands, and helped myself to some Panera about 50 minutes later to get my loud stomach to be quiet.

Most days I find myself frying up hashbrown patties from Trader Joes. They are NOT healthy at all, take forever to brown, and are always soggy in the middle. Then I also fry two eggs, eat some homemade yogurt, and drink four cups of coffee. This usually sates me for a few hours.

Anyways, I'm here to share with you my new favorite breakfast.....the sweet potato breakfast bowl. It's delicious, pretty, aromatic, and really, really flexible. And easy.

This is a big, moderately heavy breakfast and it makes a HUGE portion (think a few cups of food.) Scale back or share or have leftovers if you are a bird at breakfast.


Sweet Potato Breakfast Bowl:

Ingredients:
-1 medium organic sweet potato
-Organic olive oil for cooking
-Seasoning (salt, pepper, cinnamon, ginger, etc.)
-1/4 to 1/2 cup cooked meat or protein (bacon, sausage, ground anything, beans)
-1 or 2 eggs
-Optional: onions, chives, garlic, other root veggies, greens, spinach

Directions:
-Cut the sweet potato up into quarter-inch squares. Personally, I like to slice it into round discs about 1/4in thick, then stack three of similar size up, cut some of the skin away, and then cube.

-Precook the sweet potato a bit. An easy way is to microwave for 2 minutes. If you're anti microwave, you have two good options. The first is to boil some water in a kettle or hot pot, pour it over the spuds, and then drain after 4 minutes. The second is to put them in a pan with some liquid (water or broth) and steam for 4-6 minutes. The goal is for the cubes to be easily pierced by a fork but not fork tender...you should be able to stab them but they will stay on the fork tine. If you use either of the last two methods, drain the potatoes well in a colander or on a tea towel.

-Heat olive oil in a 10 or 12 inch skillet on medium and add the potatoes. Flip every 5-7 minutes until they're cooked almost to your liking. Then add your meat/protein. I like my spuds pretty browned on one side so I let them sit for almost 10 minutes before the first flip. Don't forget to season!! I love a good savory meal but adding some ginger and cinnamon is to die for with sweet potatoes.

-If you are adding other optional veggies, be mindful of how long they take to cook! Add your onions and root veggies with or before the potatoes but add your greens and spinach with the protein since overcooking creates bitterness.

-Pour everything into your bowl. Add more oil to the pan and cook your eggs up.

-Top your bowl with the eggs and feast!

These breakfast bowls are very simple and can be tailored to each eater's tastes. To speed up the process, I like to chop the potatoes the night before and set everything (potatoes, meat, veggies) side by side in the fridge. It's an easy dish to prepare while you're getting ready for your day...you can get the potatoes started and go brush your teeth or change a diaper or search for your mug of coffee that you perpetually lose.

**MAMA NOTES:  Stinky Baby eats what we eat as a general rule because I'm lazy. The cubed taters were too small for her to eat safely so I also cut some of the sweet potato rounds into "fingers" and cooked them in the pan with the cubes. She licked the ginger and cinnamon off and then pretty much was over the sweet potatoes but the salty sausage she loved (of course). It was Adell's brand and really yummy and has no unnatural nitrates or junk fillers so I decided it was OK for her. :) She also had some egg yolk.

10 January 2014

The Baby Who Stole Christmas

Hope everyone had a very, very merry Christmas, Happy New Year, etc, etc.


This year, Christmas was very different for all of us. We had it at our house for the first time in a very long time and my mom and brother flew out to join us. Oh, it also happened to be baby's first Christmas. But no big deal.


Only ten thousand photos of her were captured.  Most of the gifts under the tree were for her. A normally leisurely day was full of chasing her around, showing her new toys, and keeping fake pine needles out of her mouth.

And can I say it was heavenly!?  She's still too little to appreciate (or demand) all of the trappings of the holiday but old enough to recognize new toys and things.


This year we put the tree up on a big round wooden table to keep it out of her reach. The table was big enough for all of the gifts too, so they too were conveniently out of her reach. I only spent a few quick hours decorating...the mantel got a live pine bough garland and various real and faux hurricane glass items. And...that was about it for decorations...just enough to "feel" like Christmas!

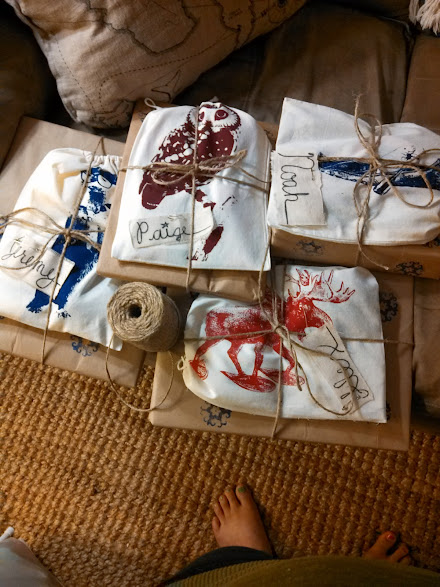
Wrapping paper?  Well, I failed to plan ahead enough to have canvas bags on hand for all of the gifts so some of them were gift-wrapped. Last year I found huge rolls of holiday paper on sale for less than a dollar so they've been lingering in the attic, waiting to be called upon.  I had hoped to avoid using it because I feel like it is wasteful, despite being recyclable, but I'm not sweating it.


Stockings? My goal this year was to not put any junk in the stockings. The adults exchanged only a few small things so the stockings were a main part of the "gift" side of Christmas. The guys got an assortment of things like tiny Moleskine notebooks, favorite candies, a mind-boggling 3D puzzle, and the like. Fun but decidedly not junky.


Gracelyn? I tried...really I did, to not spoil her. She still ended up with far too many gifts so we pared down and set some aside for her birthday this spring.

From my parents, she got an Anatex Play Cube. Made in the USA of mostly wood and metal, and just so fun. Truly a toy that will "grow with her" since it has the spinning alphabet blocks on one side and lots of good "fine motor skills" activities as well.


Lucky baby, right!? Uncle Taylor said it best: "When I wanted to play with a toy this cool, I had to go to the dentist!"

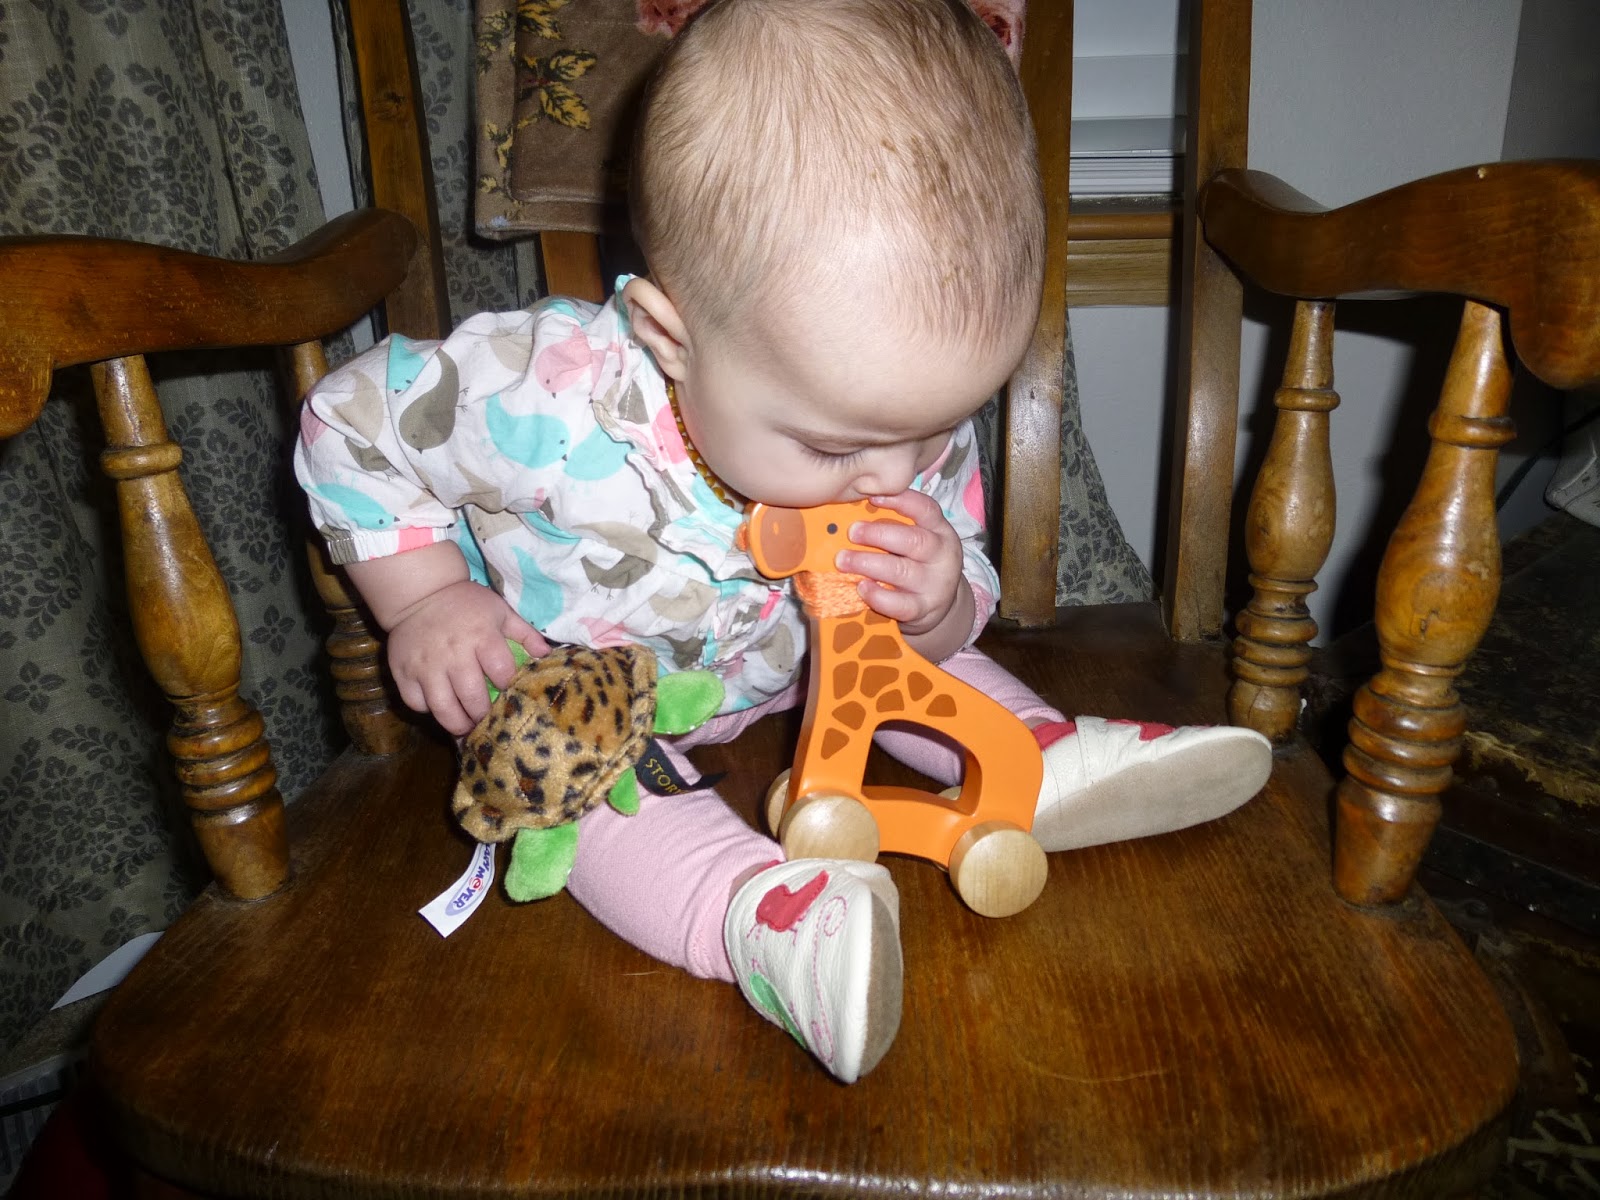
Gracelyn also got a stuffed turtle from the LeVoys which she promptly chewed on and abused as much as possible. She also got a rolling wooden giraffe from my parents and a wooden submarine teether from us.


She also got a few Priddy books from us that have animals that have textures which seems to be her newest fascination. Maybe we can teach her to pet the cheetah gently and thus pet her live dogs gently?


She got three outfits as well...my favorite is a navy blue dress with anchors and her name embroidered on it. The other two were little cotton play clothes.


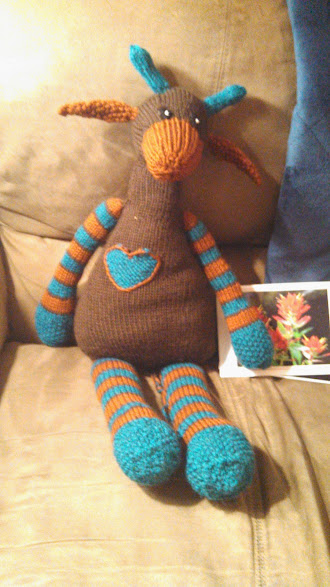
It some how eluded the camera but she got a crazy organic stuffed cat from us as well as the cutest crochet giraffe known to man from our friends in Idaho.


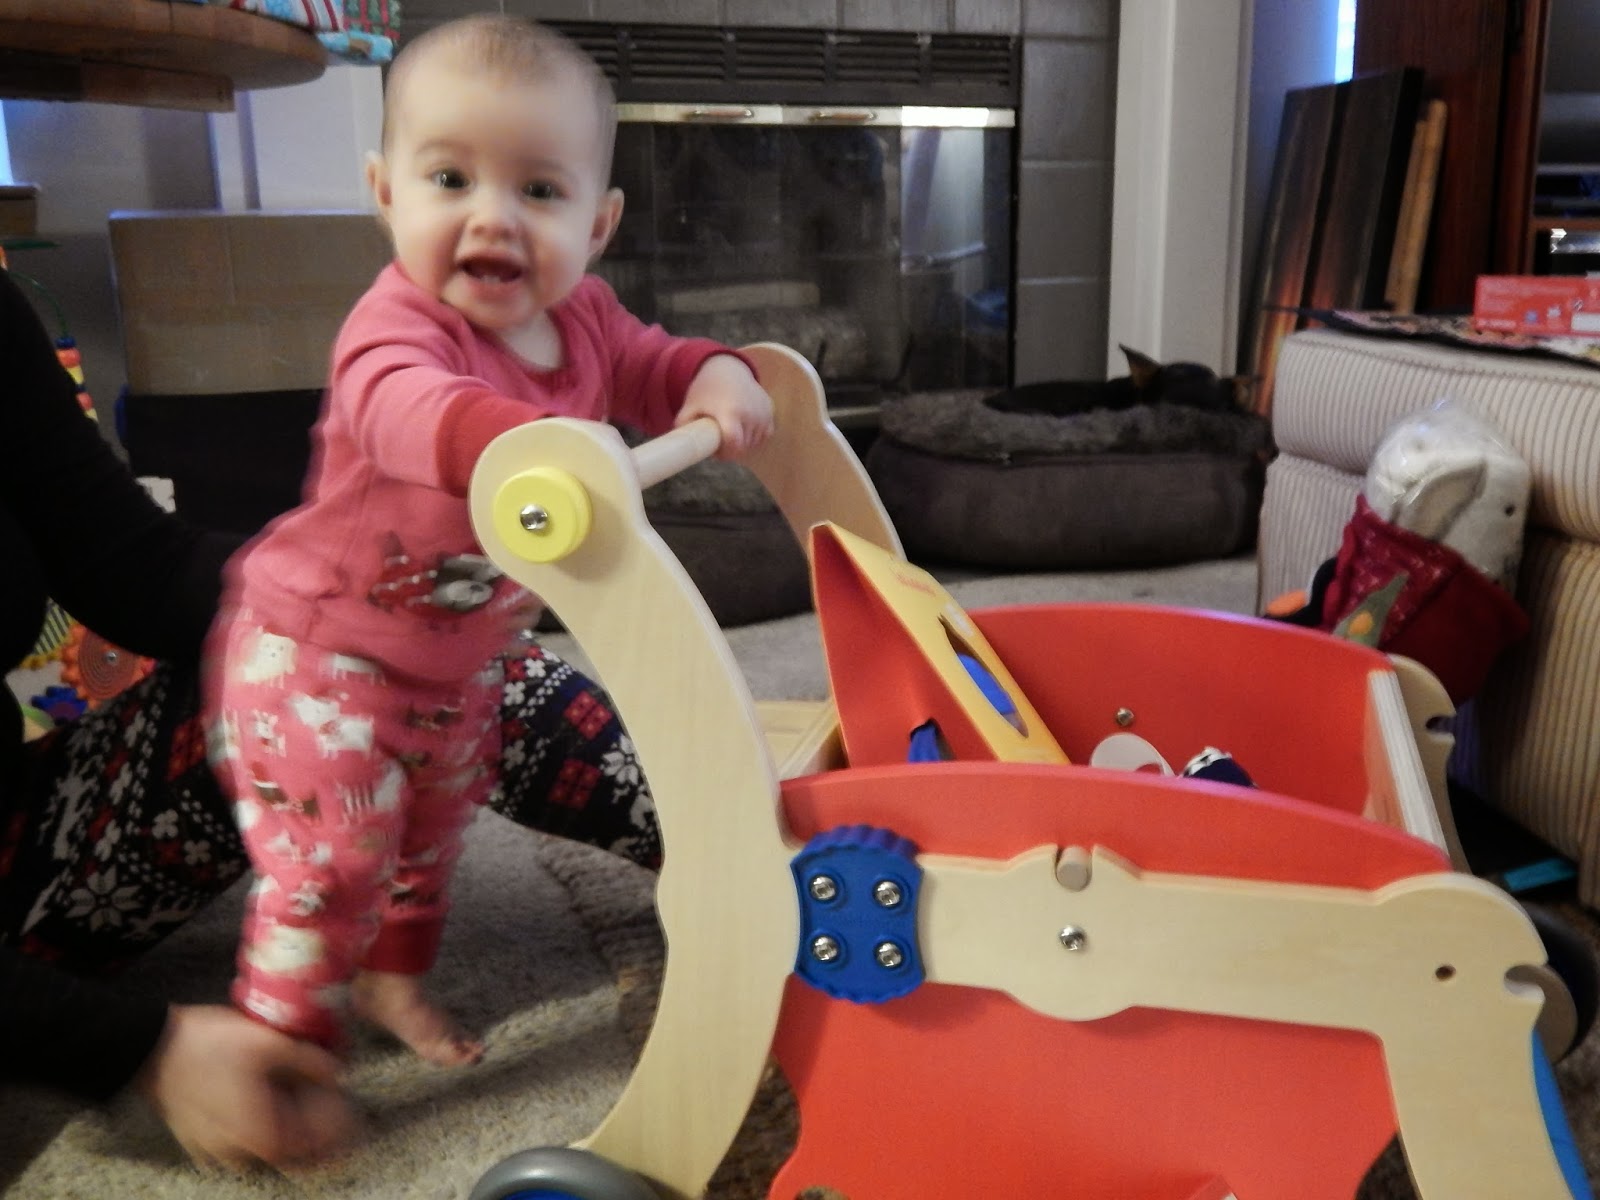
Her big gift from Santa is a 1-2-3-Grow With Me walker toy. It converts to a little push bike and later a shopping cart. Cool, right?!


To be honest, there were other gifts and things that I'm forgetting about because I don't have photographic evidence on hand to remind me AND I'm sleep deprived.

G got some exceptionally cool PlanToys from Don's mom including blocks that she pushes around in her walker and plays with every day.

So, hope everyone else had their heart's stolen this holiday season. Love to you all!

10 November 2013

Maple Brined Pork Roast Recipe

Hi everyone!

Sorry in advance for no photos...I wasn't expecting this recipe to turn out (explained below) so I didn't bother. What a pessimist.

Before I jump into the actual recipe, can I tell you about my relationship with roasts? It's a long and boring one but I'll try to be succinct.

Well, I love the idea of roasts, especially in the crock pot! I love photos of roasts being carved...my mouth is literally watering just thinking about them on Pinterest! I love buying roasts and hefting a huge hunk of marbled goodness into my cart.

But....

I am a terrible roast cooker chef person. TERRIBLE. Can I just say it again? TERRIBLE.  They're either overcooked or dry. Or just weird in texture. Or they will be cooked to perfection and have a tough ligament running down the middle. Or they juices smoke up my house as if to threaten spontaneous combustion. Seriously. Thank GOD for a husband who eats just about anything without protest.

So, want to hear a recent roast story? Got a beautiful beef roast. Got it all dressed up. Got it in the oven. Directions say to check it after 90 min for cooking temp. At 90 minutes, we check, and it was THIRTY DEGREES OVER. Yeah, bad. We carve it, and it was like eating leather.

My other half says, "Can we just be honest and not keep the leftovers?" This is the first time I've ever heard him have anything other than nice things to say about my cooking. My feelings, however, are not hurt because my jaw is too tired from eating a tiny sliver of this old boot to care.  (Don't worry, I didn't throw it away....I stewed it, which softened it up immensely!)

So when I sat down to find a recipe for a pork roast that we intended for other things but then had extra, I wasn't feeling that confident. Hah. I was actually feeling like I wasn't allowed to cook another roast ever again.   But, I stumbled upon this Maple-Brined Pork recipe and figured it was worth a go.

I watched the thermometer with an eagle eye. So did dear husband. We were both pretty invested in not messing it up, I think. PTSD from Mr. Leather Boot Beef Roast, perhaps?

Well it turned out great. We ate the entire roast. I'll tell you that it was only a 1.4 lb roast to make myself feel better, but yeah, we pigged out on the pig roast. Delicious!

Here's the link: http://allrecipes.com/Recipe/Maple-Brined-Pork-Loin/Detail.aspx?event8=1&prop24=SR_Thumb&e11=boneless%20pork%20roast&e8=Quick%20Search&event10=1&e7=Home%20Page

And here's what I did:

Ingredients:
-1.4 lb boneless pork sirloin roast
-2 cups water
-1/3 cup salt
-1/4 cup maple syrup
-1.5 tbsp minced garlic
-2 tbsp chopped fresh ginger
-1 tsp dried rosemary
-10 turns of the pepper mill
-1 tbsp olive oil
-1 tbsp dijon
-1 tbsp maple syrup again

Directions:
Mix everything except the last three ingredients together in a bowl. Cover and refrigerate 8-10 hours. I wouldn't go over 10 or it'll get salty.

Heat oil in dutch oven and brown on all sides, about 10 min total. Preheat oven to 325F.

Use a DAMMED THERMOMETER and pull it out at 100F. Combine the dijon and maple syrup and spoon over roast. Put back in oven until roast reaches 145F. Don't get distracted. Don't forget about it. Just don't.

Remove from oven. Let sit for a few minutes. Carve and pig out!

14 October 2013

Soup in a Pumpkin!


Well, fall is my favorite. Besides sweaters and no shaving, I'm in love with all things pumpkin. (Except for pumpkin lattes. Ick.) Anyways, pumpkins are for more than carving! We eat as much pumpkin as we can and then we freeze a bunch more.

This soup in a pumpkin was a fun recipe I tore out of a magazine. It might've been "Redbook" but I'm honestly not sure. Anyways, I almost never follow a recipe as written, so I'll share the magazine page and then share how I did it. Happy Harvest, everyone!


"Original recipe" from unknown magazine
Ingredients:
1 tbsp unsalted butter
1 tbsp olive oil
2 small sweet onions, roughly chopped
1 large spoonful minced garlic
3 celery stalks, roughly chopped
1 large tomato, seeds discarded, roughly chopped
2 tsp dried thyme
2 stocks fresh rosemary
Salt and pepper
2.5 cups stock or bone broth (I used homemade chicken bone broth)
1/4 cup heavy cream
2 sugar pumpkins (2-3 lbs each)
*This is one of those recipes that is super easy and affordable to go all organic with. Except the darn pumpkins. Organic pie pumpkins are elusive and far pricier than they're worth.


1. In a dutch oven, heat oil and butter over medium. Add onions, garlic, celery, tomato, thyme, rosemary, salt, and pepper.  Cook until onions begin to be translucent (8-12 min)
2. Add in broth. Boil. Remove from heat. Slowly stir in cream. Preheat oven to 375F.
3. Carve up the pumpkins....cut the top off and clean out insides using a spoon. This is pretty messy, especially if you have big hands, so you've been warned.
4. Set pumpkins on a cookie sheet. Season insides with salt and pepper. (I found this sort of impossible so I shook a little of each inside and said, "Whatever!") Ladle soup into bowls carefully.  It's molten. Discard the rosemary.
5. Put the lid on the pumpkin and roast for 60-90 minutes, just until flesh is knife tender. If you let them go any longer, the entire pumpkin turns to mush and molten soup goes everywhere.
6. EAT. So delicious. Scoop out pumpkin flesh with each bite of soup and be happy.


27 September 2013

How to Braid Your Woven Wrap

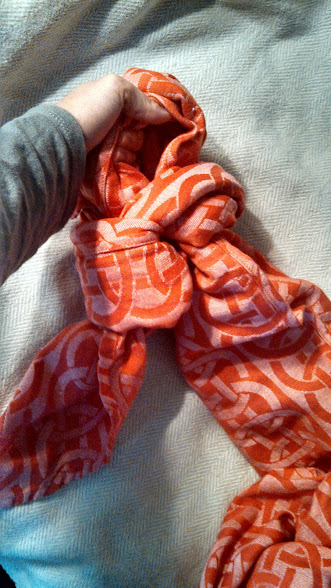
Quick photo tutorial on how to braid a woven wrap.

Why would you want to braid your wrap? Well, the act of looping and pulling helps to "break it in."  You'll notice the more you braid, the tighter your braid gets....proof your wrap is softening up!

STEP 1: Tie a knot at one end that pinches a loop
See the short tail? That was the "end" I tied closest to. The long  tail that goes out the bottom of the photo is the rest of the wrap.

STEP 2: Stick your hand through the loop you just made. Ideally you want the loop to be *just* big enough for your fisted hand to move through. No bigger, no smaller. If you're loop is WAY off, adjust, otherwise, leave it and try for a better size next time because it's not that vital.  Now, stick your hand through the loop.


STEP 3: Grab the long tail of your wrap. Keep a hold of it, and pull your hand back out of the loop. (Sorry for the blurry photos.) 


The next photo shows the new "loop" you'll have made by pulling only part of the long tail through.

STEP 4: Put your hand through the new loop you just formed, grab the long tail, and repeat until you run out of wrap!
This is what a finished "braid" looks like on a size 4 wrap:

The end of the wrap is just sort of tucked under the braid at the bottom in this photo. To unbraid, just grab that loose end and pull! The whole thing will come undone.

One last photo....the wrap on the left is a barely broken-in size 4. The one on the right is a very broken in size 6. Due to fiber content, the wrap on the left will never make a braid as small and tight as the one on the right, but it will make a tighter braid than pictured and will start to lay flatter when braided.


22 September 2013

Wishlist for G

Hi everyone!

Just a fair warning, this post is not for you. Hah! Well, it might be if you were planning on asking us what we wanted for Christmas. If not, then that's fine too. Don't feel obligated to get us a gift now just because I shoved our wishlist in your face.

Also, I'll be updating this periodically so apologies in advance for making you read this over and over.

For those of you who are going to ask what we want for Xmas, the truth is that we want things for our daughter, for the most part. 

The next truth is that we are a wee bit picky.  Next, I'm going to tell you why we're picky. It doesn't really make up for the fact that we're picky, but maybe it'll make you less annoyed by our pickiness.

1) G is so young she doesn't care what her toys and possessions are made of. She isn't coveting a Barbie or other toy made of plastic. As long as she doesn't care, we don't need to be giving her things that are toxic.

2) G still puts everything she grabs in her mouth. Again, why bother with things that are toxic?

3) We live in a lovely house with almost no storage. We don't have room for junk or things we don't love or use. I know that sounds blunt and harsh but such is the way of the world.

Ok, glad we got that out of the way.

Next up is a general overview of what we love and use:
*Unfinished, sanded hardwood toys and teethers. They can be finished with beeswax or other organic type waxes and even water-based food dyes.
*Food grade silicone
*100% cotton items. Organic is ideal if it's considered a "teether" but plain old cotton will do just fine.
*Made in the USA! Not only is it great to support our local economy, but it's safer.

Things we avoid:
*Plastics of any kind. Even if the package says "BPA free" there are still other chemicals that leach out.
*Microban and other antimicrobial coatings
*Polyesters (which are often doused in flame retardants)
*Anything scented or dyed with unknown dies. RIT dye is NOT safe for babies, for example.
*Toys "older than her age" like play makeup.
*Toys that use batteries, light up, or make annoying sounds. She's going to want them sooner or later so let's not rush into the annoying toy phase any earlier than necessary!
*And, of course, anything that is a potential choking hazard.


OK, so now I'm sure you're thinking, "What a party pooper! How will I find anything that makes this nincompoop happy?"  So now I'll give you some examples!   **FAIR WARNING** the links I am providing are to goods that are usually handmade, often on etsy. These things are NOT cheap. Please don't get 10 cheap gifts when you could get one awesome, handmade in the USA, organic gift. We are all about quality over quantity for sure. And we totally know the value, monetarily and morally, of the gifts. Also, clicking on any of the etsy photos should take you to the listing, and prices exclude shipping.

First up: a wooden teether with organic cotton "ears."    I think these are adorable. We have a similar one that doesn't have ears. Instead it has a pocket that holds ice cubes. Genius! I would love one more so I can wash one and still have one for her to play with.

From Bunbunbabydesigns on etsy. Organic cotton and organic maple wood ring. $12

From Rewoodtoys on etsy. Wooden teether. $13. We love any thing like this! 


Next up: organic cotton "stuffed animals". I love the clean, simple aesthetic!

From Soulrole on etsy. Organic cotton bunny. $15
From StarBrightBaby on etsy. Organic cotton giraffe. $18


Next, neato toys for when she's a bit older:

From SmilingTreeToys on etsy. Two sided wooden puzzle $15.


From LittleSaplingToys on etsy. Organic wooden blocks. $15. Can I say these are my absolute favorite? If anyone buys these, PLEASE let me know because I think I'm getting these for her for Christmas!

Also from LittleSaplingToys. Stacking rainbow. $40. LOVE! 


Next up: Quirky, fun clothing. I'm particularly crushing on bold, modern prints!
From FableBaby on etsy. Organic leggings, handprinted. $43. (Ouch on the price!)
From downhomeamy on etsy. Organic bibs. $19.95. (I'm crushing on all of her bibs SO hard. I might have to splurge on one or two if she's eating solids before Christmas.)
From Zmunki on etsy. Baby kimono!!!  $25


Stuff for mama and papa:
From TheVintageHoneyShop on etsy. Teething necklace. $18. (I love these. G rips my shirts or hair while she eats so these have been a real life saver. And they're just lovely, aren't they?)

Gifts for when she's much older:
From CakeInTheMorn on etsy. Toy map. $10. HOW CUTE.

Any felt pretend play toys! I can't wait to play with these myself, hahaha. These are all from CreationByM on etsy with varying prices. Tell me these aren'te the cutest, most creative toy foods you've ever seen!!!!!


OK, OK. I'm done with the food! For now.